")
")
Sculpting mushrooms
Specifications
-
Y'know... I happen to like mushrooms!
I think that adding a few carefully place mushrooms on a base leads to great results (although some might find that cheesy ).
).
With that said, here's my technique for making pretty 'shrooms.
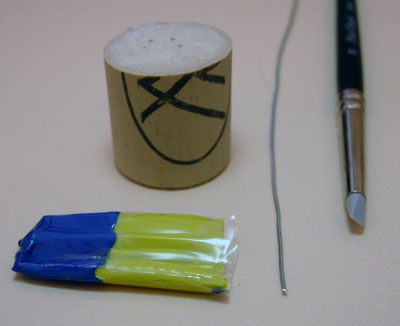
REQUIRED MATERIAL
- A rubber brush or “color shaper” (In this tutorial, I use a size 0 flat rubber brush)
- A cork
- Wire (0.8mm)
- A pair of cutting pliers
- Some Green Stuff or “Duro” (I prefer Duro for this kind of small work due to its stickiness, but other putties such as Milliput or Fimo work just as well
- A bit of liquid dish soap (to smooth things and keep the Duro from sticking)
- The bottom of a blister and its foam (to lube the rubber brush)
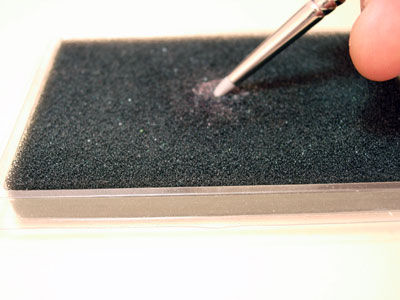
To smooth out the Duro, I use the bottom of a blister with its foam, on which I drizzle liquid dish soap. All you have to do then is rub the rubber brush on the soap soaked foam so that the Duro doesn't stick to the brush. This makes smoothing the Duro much easier.
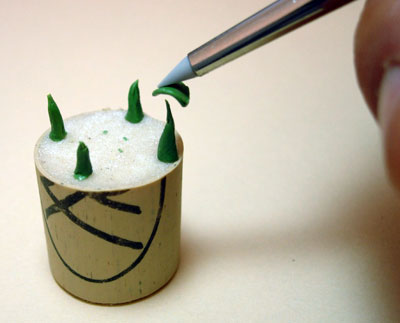
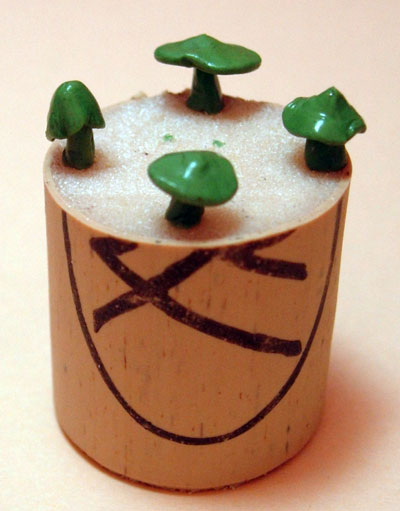
Cut the wire in small bits of about 2 cm each.
4 bits at the most for each cork, in order not to be hindered during the work.
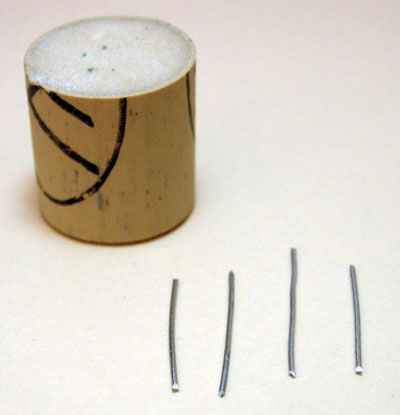
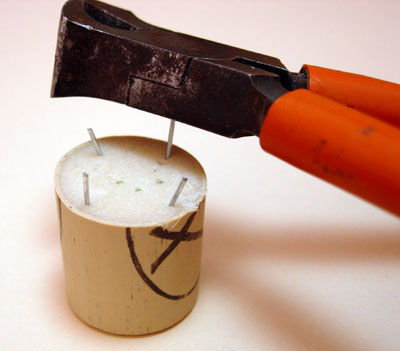
Stick your wires in the cork, leaving only the required height showing. Make various heights going from 4mm to 8mm in order to have a wider range of sizes.
I use the flat of the pliers to stick the wires in the cork and avoid pricking your fingers (I have a few bad memories... It's painful!).
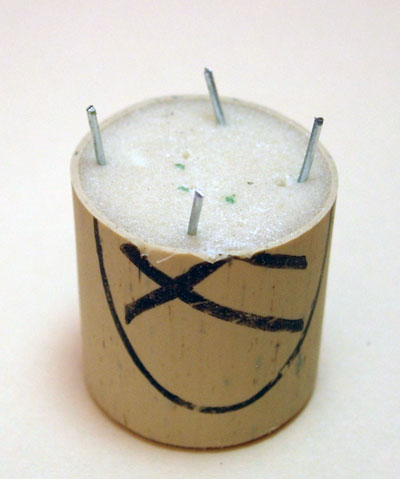
You should get something that looks like the picture below (you can give a slight angle to a few of the wires for a bit of movement to your mushrooms)..
Place a small ball of Duro (with your fingers) on each wire, taking care to cover all of the wire with it, and ensuring that it adheres firmly to the wire..
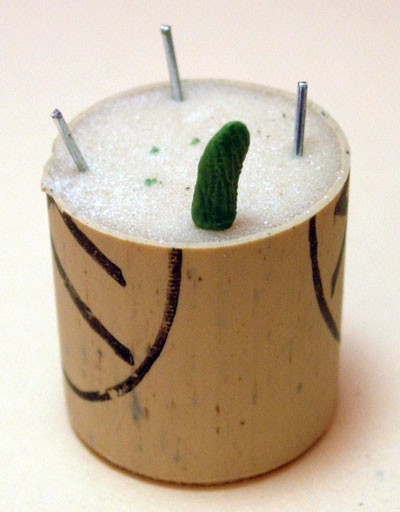
Once all four wires are covered, start to smooth out your putty with the rubber brush (which has already been lubed with dish soap, as detailed in step-0), by pulling the putty towards the top of the wire. This will help to sharpen the mushroom (it needs to have a slight cone shape), get rid of excess Duro, and make sure it's properly stuck to the wire..
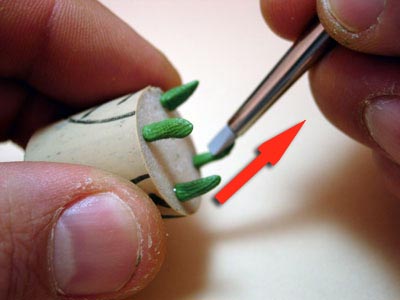
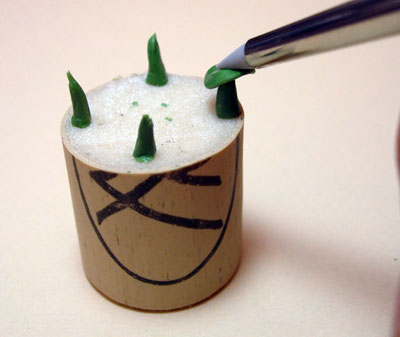
Pull the accumulated excess Duro to the top of the wire.
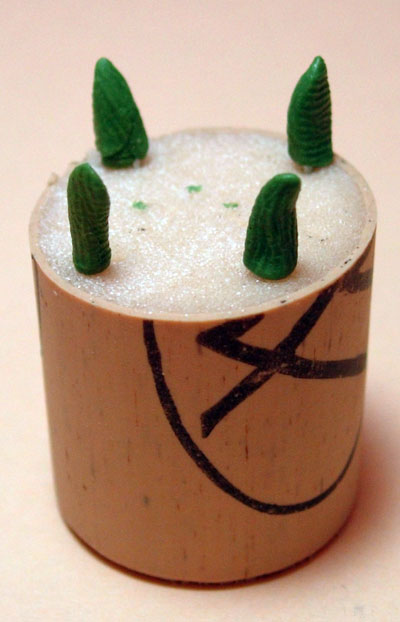
Here's what yours should look like – don't hesitate to smooth it out again if required.
It's important to leave a bit of stuff at the top of the wire, in order to help with getting your mushroom's cap to stick more easily.
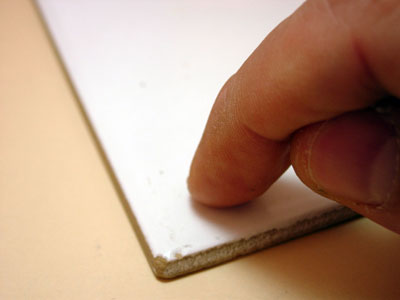
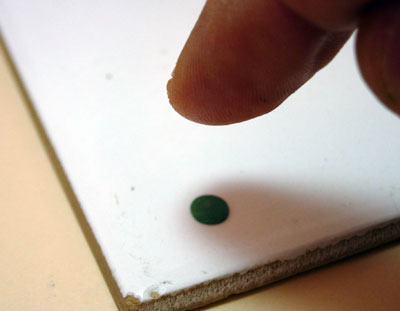
Apply a bit of liquid dish soap with your finger to a ceramic tile (or any other flat and non-porous surface). This is to prevent the mushroom's cap from sticking to the tile..
Place a small Duro ball on the part which has been previously lubed.
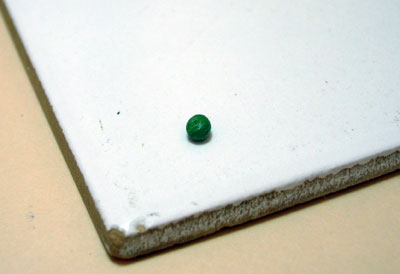
Lube up your finger (to keep the ball from sticking to your finger) and flatten the Duro ball.
Smooth out the flattened Duro with the rubber brush (be sure the brush is lubed, too).
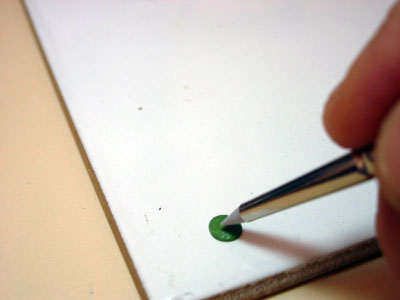
If your tile has been properly lubed, you should be able to easily remove the mushroom cap.
Once removed, place it (using the rubber brush) on the top of the wire, making sure it's roughly centered.
Once the cap is centered, firmly press on it (not too firmly though, so that the wire doesn't poke through it) to make it stick to the base.
Smooth it out and give it the desired shape (more or less flat or cone-shaped).
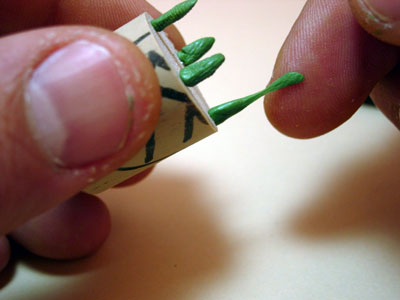
Here's our finished mushrooms. All that's left is to leave them to harden.
Once hardened, delicately remove your mushrooms from the cork by sliding a thin blade under the base of the mushroom to get it unglued from the cork, and gently pull to finish removing the wire from the cork.
The remaining bit of wire will be used to stick your mushrooms to your scenery. If, for any reason, one of the caps happens to fall off, keep calm – a bit of glue should fix the problem.
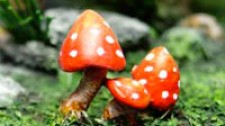
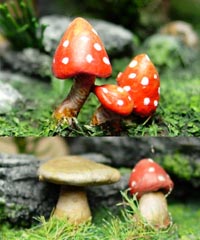
Here's an example of finished and painted mushrooms...
Tutorial translated by Eric HARLAUX
© ANAKRON Miniatures Studio - WWW.ANAKRON.FR
Tous les textes, photos, sculptures, dessins, vidéos, etc... de ce site sont la propriété de leur auteur et ils ne peuvent en aucun cas être utilisés sans son accord.Si vous souhaitez pour quelque raison que ce soit utiliser un élément issu de ce site contactez moi au préalable. Merci.
ANAKRON Miniatures Studio - c/o AYRAL David - 28 Avenue Gambetta - Appt 3 - 81300 GRAULHET - France - SIRET : 508 232 188 00013