")
")
Making a photo studio
Specifications
-
As this tutorial is already getting old, some of the products presented here are no longer available for sale at the suppliers linked to.
I've thus updated some product links to other equivalent or even better products. I've decided to prepare a second version of this tutorial, a simpler and more efficient one.
In the meantime, you can still use this tutorial, which will still give you useful instructions.You've just finished your last piece and want to share it with the rest of the planet, but... your pictures aren't really good...
The point of this tutorial isn't to teach you how to take pictures, some have done that better than I have HERE, but to show you how to build a small (easily transportable) photo studio, in order to get the best result.
We'll start by making a support.
This is made using foamcore 70 cm long by 20 cm tall (as it has the advantage of being able to be cut cleanly and being of a white tone that reflects light) but it can also be made out of regular cardboard or even out of wood, if you're handy.
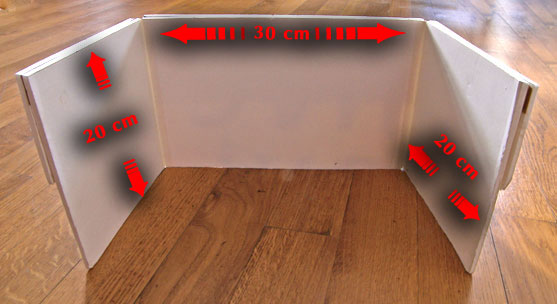
2 flaps of 20cm by 20cm are cut and strengthened with scotch tape, which will double as hinges. We'll use these two flaps as reflectors.
We'll put double-sided scotch tape on each flap.
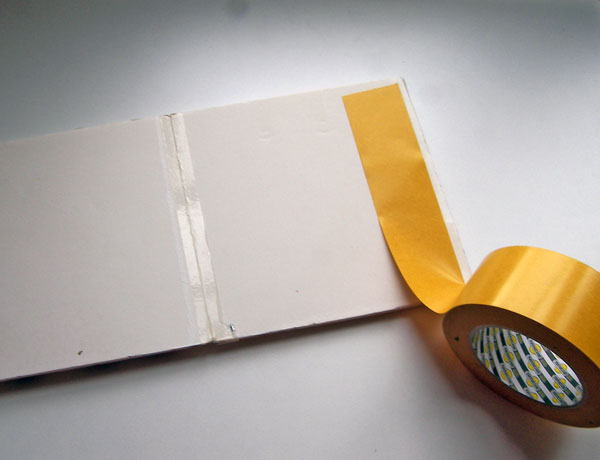
The reflectors are stuck to the flaps. In this instance, they've been made using leftover isolation foam, but they can be made using tinfoil. You can even leave the cardboard as is (if you've used white foamcore).

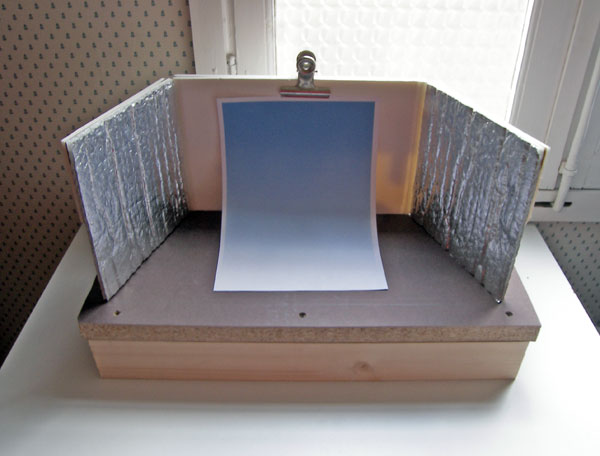
Our studio starts to take form.
We print out a background with a blue to white gradient (you can download one in the Goodies section of the site). Print it out in high resolution and on matte paper. A shiny paper will reflect the light and will ruin the pictures.
The background is held in place here by a sturdy binder clip, but you can also use bluetac.
Avoid taping it, it would damage the cardboard when getting replaced (oh yeah, and it gets dirty after a while
 ).
).You can see on the picture that I've made a small 10 cm high support, so that the spots (see following step) are at the right height. It's simply made with a plank and two wooden planks.
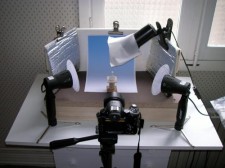
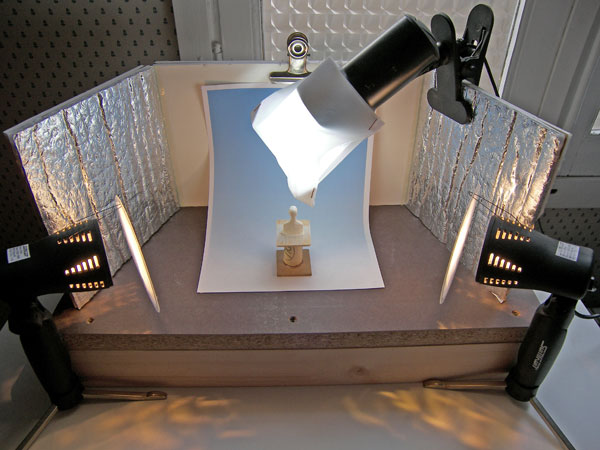
There, the studio is ready!
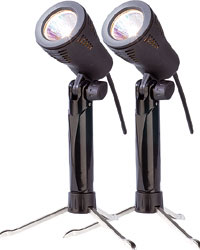
The hardest factor when taking good picture is the lighting! After much research, I've finally found what I needed – "daylight" bulbs. These are especially adapted to photography and aren't too expensive! You can find them at a reasonable price over HERE!
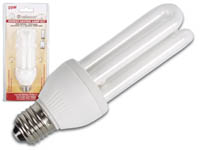
Another clipped spot, that I had lying around, is placed above for zenithal lighting. It's fitted with an energy saving "white light" bulb (not easy to find ). But I've found for you over HERE.
This kind of light bulb is perfect to paint and is easily adapted to all types of desk lamps (I advise you to order a number of them, as they quickly become indispensable!).
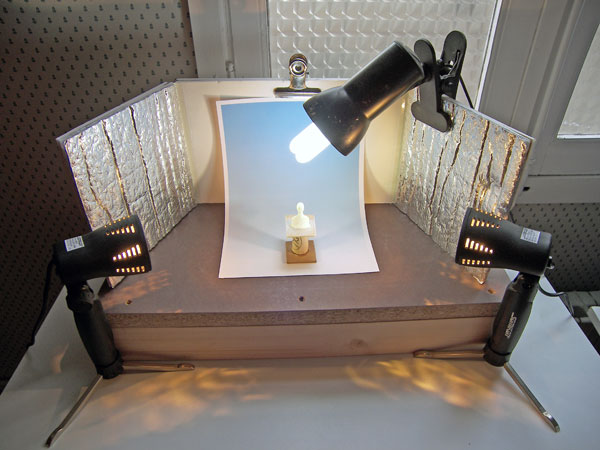
As you can see on the photo above, the shadows of the subject are clearly showing and that the light is too direct.
So we'll make masks to filter the light. 2 rings are made (1 for each mask) with a simple piece of plastic 12 cm in diameter (cardboard will also work quite well).
White nylon is glued on the plastic ring at this point (two layers of tracing paper can replace the nylon).
A small piece of wire is placed, in order to keep the mask on the spot yet keep it from the light source, because since the spots are halogens, they HEAT UP! And risk burning our mask...
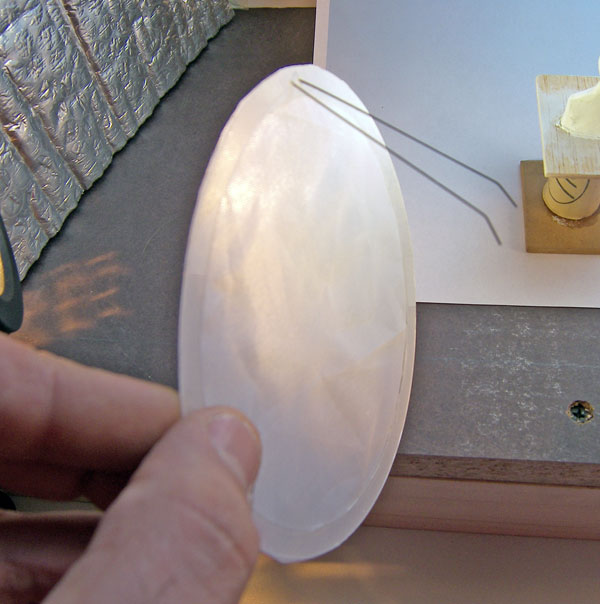
There – the mask is in place.
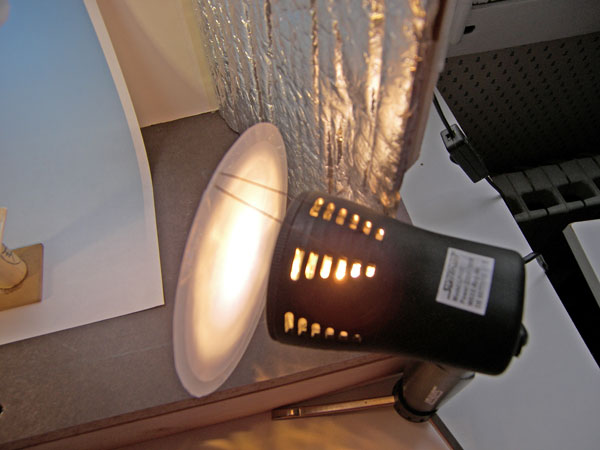
As you can see, the light is better diffused over the subject and the shadows are now nearly nonexistent.
For the zenithal spot, a double layer of tracing paper is used as diffuser. Since the lamp heats very little, it can be placed almost straight on the bulb.
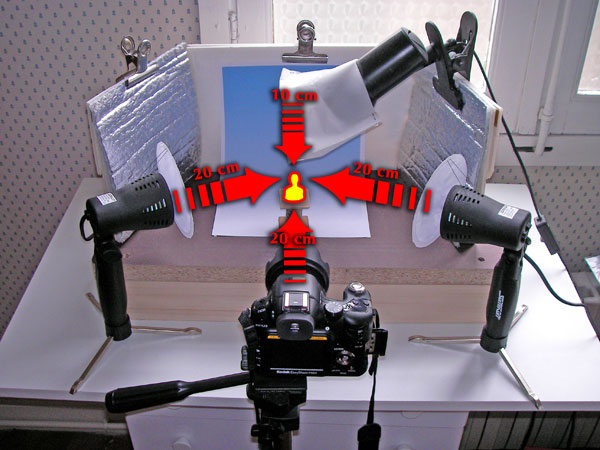
Here you've got a picture with the distances that I use to take pictures of my miniatures. Be careful – these are just there as guidelines, as they can vary depending on your camera.
Refer to the tutorials I linked to at the beginning for better instructions regarding shooting pictures.
There, I hope this short tutorial will help you put your work in a better light !
Tutorial translated by Eric HARLAUX
© ANAKRON Miniatures Studio - WWW.ANAKRON.FR
Tous les textes, photos, sculptures, dessins, vidéos, etc... de ce site sont la propriété de leur auteur et ils ne peuvent en aucun cas être utilisés sans son accord.Si vous souhaitez pour quelque raison que ce soit utiliser un élément issu de ce site contactez moi au préalable. Merci.
ANAKRON Miniatures Studio - c/o AYRAL David - 28 Avenue Gambetta - Appt 3 - 81300 GRAULHET - France - SIRET : 508 232 188 00013